How to Get Your Song on Spotify The Indie Artist Guide
- Aug 24, 2025
- 16 min read
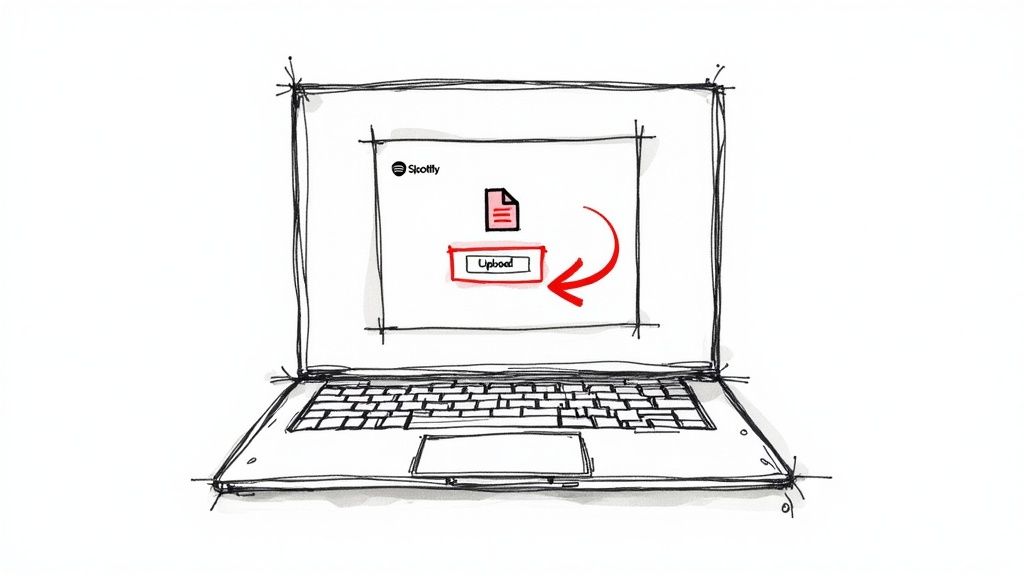
To get your music on Spotify, you can’t just upload it directly. You’ll need to work with a digital distributor like DistroKid or TuneCore. They're the bridge between you and the platform.
But before you even get to their upload forms, there’s some critical prep work to do. Getting this right is the foundation of your entire release.
Laying the Groundwork for a Flawless Release
Think of launching a song like building a house—you can't put up walls without a solid foundation. Getting your assets in order isn't just about checking boxes; it's about making sure your release doesn't get rejected for technical reasons and showing the industry you're a serious artist.
This pre-flight checklist is designed to give your track the best possible chance of making an impact right from day one. Skipping these steps can cause frustrating delays or result in your song looking and sounding amateurish.
Perfecting Your Master Audio File
Your music is the most important piece of the puzzle. The quality of the audio file you submit directly impacts how your song sounds to listeners on Spotify. Even though they’ll hear a compressed version, providing a high-resolution master is the only way to ensure it sounds its best.
Always, and I mean always, export your final track as a WAV file. Please, don't upload an MP3. WAVs are uncompressed, which means they keep all the original detail and dynamic range of your mix. If you upload a low-quality MP3, Spotify’s compression has less to work with, and your track will probably sound thin and lifeless.
Here are the specs nearly every distributor will ask for:
File Format: WAV. It's the lossless industry standard for a reason.
Bit Depth: 16-bit is the absolute minimum. Go for 24-bit if you can for better resolution.
Sample Rate: 44.1 kHz is standard for digital distribution.
A huge mistake I see artists make is mastering their track way too loud. They think it'll make them stand out, but Spotify uses loudness normalization to keep everything consistent. If your track is too hot, they'll just turn it down. Focus on a clean, dynamic master, not a crushed one.
Designing Your Album Art
In an endless sea of new music, your cover art is your first impression. It has to be good enough to make someone stop scrolling. Your artwork needs to be sharp, clear, and designed to look great everywhere, from a big desktop monitor to a tiny phone screen.
Spotify and distributors have strict technical requirements for artwork. If you don't meet them, your release will be rejected flat-out. No second chances.
Dimensions: It has to be a perfect square, at least 3000 x 3000 pixels. This high resolution keeps it from looking blurry.
File Format: Stick to JPEG or PNG.
Color Profile: Always use RGB, the standard for digital screens.
And a pro tip: keep your artwork clean. Don't plaster URLs, social media handles, or "Now on Spotify" text on the cover. Let the art speak for itself and represent the music.
Crafting Your Professional Identity
Beyond the song and the art, you need to think about you. When someone discovers your music and gets curious, they're going to click on your artist profile. A well-written bio and professional photos make that profile feel complete and engaging.
Your bio is your story. It's your chance to connect with people. Who are you? What drives your music? What makes you unique? Keep it punchy and personal. Give editors and fans a reason to care.
Professional press photos are just as important. These are what blogs, playlist curators, and Spotify itself will use when they feature you. A set of high-quality, well-lit photos shows you're taking your career seriously and gives the media what they need. With all this groundwork done, you're ready for a smooth and effective release.
Navigating Music Distributors to Find Your Partner
Alright, you've mixed and mastered your track, and the cover art is looking sharp. What's next? You need to pick a digital music distributor. You can't just upload your song directly to Spotify; you need a middleman to get it on the platform, and this choice is a big one. Think of it less like a delivery service and more like finding a long-term partner for your music career.
The market is crowded with options, and they all operate a little differently. Getting a handle on their business models is the key to figuring out which one actually fits your goals. There’s no single "best" choice for everyone—only the best choice for you.
Understanding the Different Fee Structures
The biggest fork in the road when choosing a distributor comes down to how they charge you. Most services fall into one of two camps: you either pay an annual subscription, or you pay a one-time fee and they take a cut of your earnings. Each has its pros and cons, and the right one for you really depends on how often you plan to release music.
A service like **DistroKid** runs on an annual subscription. You pay one flat fee per year for unlimited uploads and get to keep 100% of your royalties. This is a no-brainer for prolific artists, producers, or bands who are constantly dropping new music. If you're releasing a single every month, this model is incredibly cost-effective.
Then you have distributors like **CD Baby**, which use a one-time fee model. You pay once for each single or album, and it stays on streaming platforms forever. The trade-off? They take a commission—usually around 9%—from your streaming royalties. This can be a great fit for an artist who only drops an album every couple of years and doesn't want another annual bill to worry about.
Ultimately, it's a numbers game. If you're banking on high streaming numbers, a commission-free model could save you a ton of cash down the line. But if you're just starting out and want to keep upfront costs low, paying per release might feel like the safer bet.
Key Factors to Compare Beyond Price
While cost is a huge piece of the puzzle, it’s not the only thing that matters. A good distributor should be more than just a delivery truck; they should be a partner that offers tools and support to help you grow.
As you're weighing your options, dig into these features:
Speed to Live: How fast can they get your music from your computer to Spotify? Some can get it done in a couple of days, while others might take a week or more. This matters.
Customer Support: When things go wrong (and trust me, they sometimes do), you need support that’s actually responsive and helpful. Check out reviews and see what other artists are saying about their customer service experiences.
Backend Services: What else are they bringing to the table? Look for valuable extras like sync licensing opportunities (getting your tracks in TV shows, films, or ads), YouTube Content ID, and deep analytics.
Ease of Use: Is their upload process a breeze or a nightmare? A clean, simple interface will save you a lot of time and frustration.
This infographic breaks down the technical specs your distributor will need from you to get your track on Spotify.
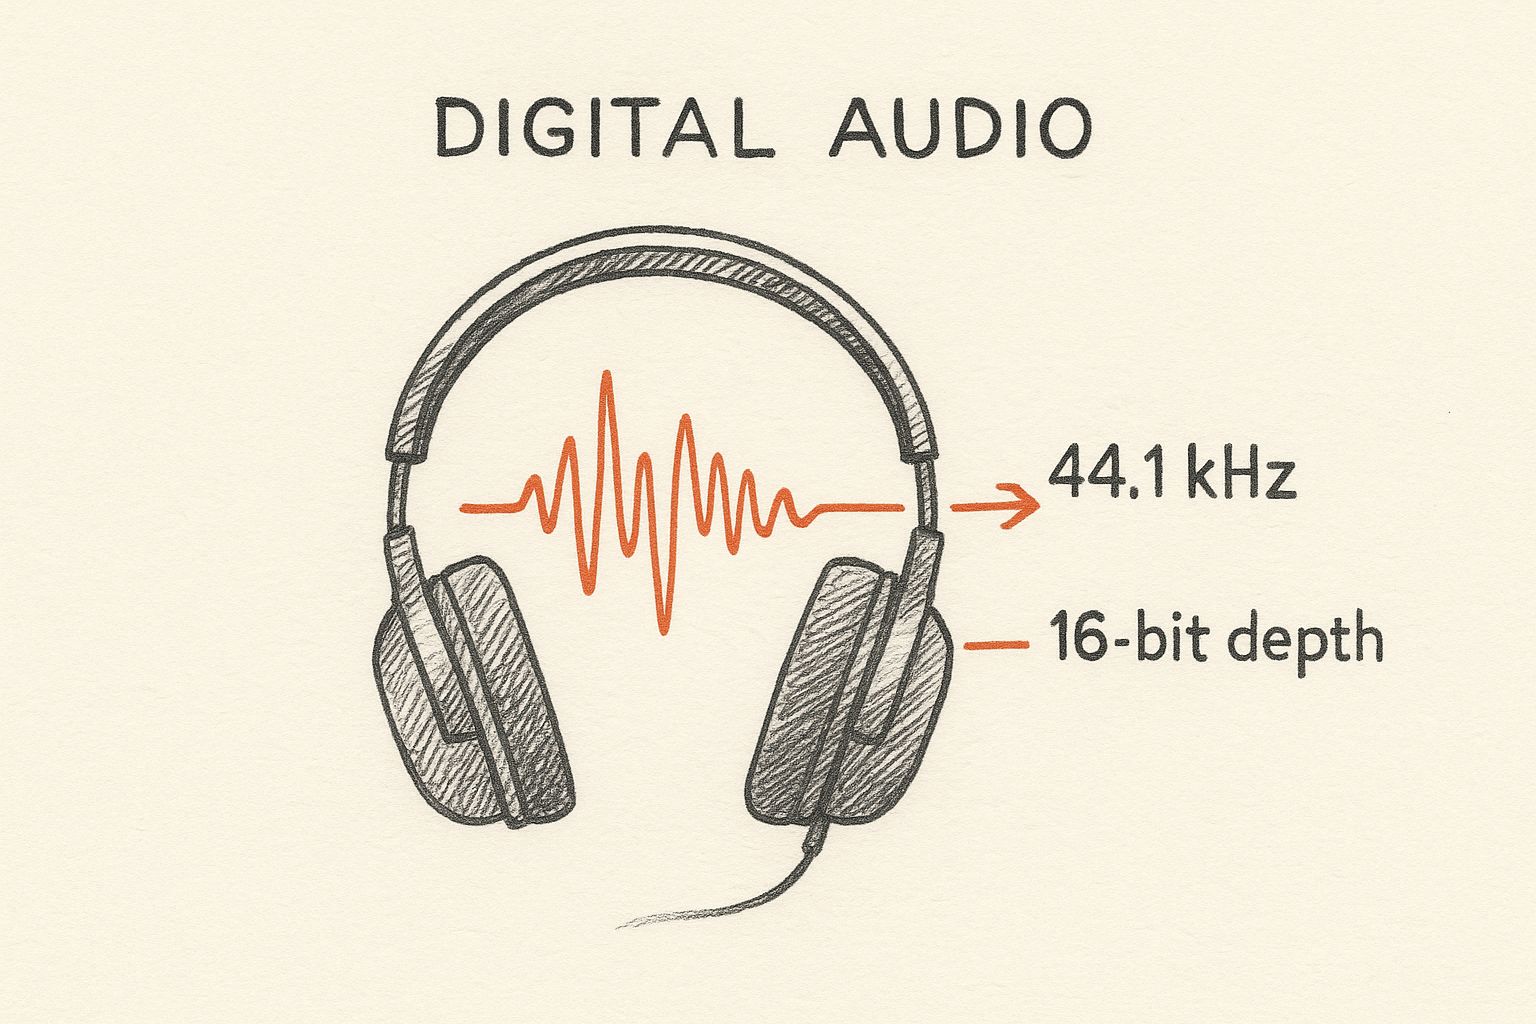
Hitting these requirements, like the 44.1 kHz sample rate, is non-negotiable. It’s the only way to make sure your audio quality sounds as good on Spotify as it did in the studio.
Making the Right Choice for Your Career
Choosing your distributor is a critical first step. These services are the ones who handle the nitty-gritty of the submission process, making sure your files and metadata meet all of Spotify’s technical standards. The time it takes for your song to go live can be anywhere from a few days to a few weeks, which is super important to know if you’re trying to **submit music to Spotify playlists** with enough lead time.
To really see how this works, let's picture two different artists. A hobbyist producer putting out four tracks a year might find a one-time fee service way more manageable. On the other hand, a touring band aiming to drop a new single every six weeks would almost certainly save money and hassle with an unlimited subscription plan.
Picking a distributor isn't just about your next release; it's about setting yourself up for the future. So, take a moment to compare the big players side-by-side.
Music Distributor Feature Comparison
This table gives you a quick snapshot of what some of the most popular distributors offer, helping you see past the price tag to the features that will actually help you grow.
Feature | DistroKid | TuneCore | CD Baby |
|---|---|---|---|
Pricing Model | Annual Subscription | Annual Subscription | One-Time Fee per Release |
Royalty Split | 100% to Artist | 100% to Artist | 91% to Artist (9% Commission) |
Unlimited Uploads | Yes (on all plans) | Yes (on all plans) | No (pay per release) |
Speed to Spotify | 2-5 days | 1-3 days | 1-5 days |
YouTube Content ID | Yes (for a fee) | Yes (for a fee) | Yes (included with Pro) |
Sync Licensing | No | Yes (add-on service) | Yes (included) |
Think about your long-term plans. Are you going to be releasing a ton of music? Are sync placements a major goal? Do you need detailed analytics to track your growth? Your answers will point you to the right partner. Don't just pick for today—choose a distributor that can grow with you.
Mastering Your Metadata for Maximum Discoverability
After picking your distributor, you'll hit the part that feels like homework: filling out a bunch of forms with your song's details. It’s easy to rush through this, but don't. This isn't just paperwork; it’s the DNA of your track. This is your metadata, and it's the hidden language that tells Spotify everything it needs to know—who you are, what your song sounds like, and who to show it to.
Getting your metadata right is non-negotiable. Bad info can lead to lost royalties, terrible search visibility, and a cold shoulder from the algorithm. Let's break down how to nail every piece of this puzzle.
The All-Important ISRC and UPC Codes
Before you can upload anything, you’ll need two specific codes: an ISRC and a UPC. Think of these as your song's passport and social security number for the global music world.
ISRC (International Standard Recording Code): This is a unique fingerprint for a single recording. If you have your main track, a radio edit, and a remix, each one gets its own unique ISRC. It’s how Spotify tracks plays and pays royalties for that specific master recording.
UPC (Universal Product Code): This is the barcode for the entire product. If you're dropping a single, the UPC is for that single. If you're releasing a 12-track album, the UPC identifies the whole project.
So, where do you get them? Thankfully, you don’t have to go hunting. Most distributors, like DistroKid or TuneCore, generate these for you automatically—often for free—when you upload your release. For 99% of independent artists, this is the way to go. You can buy them yourself from the U.S. ISRC Agency, but it's an unnecessary extra step.
One of the most common mistakes I see is artists reusing an ISRC for a slightly different version of a track, like an extended mix. Don't do it. Every unique master recording must have its own unique ISRC. Otherwise, you're just creating a tracking and payment nightmare for yourself.
Giving Credit Where It's Due
Music is rarely a solo sport, and your metadata needs to reflect the whole team. Properly listing every single person who touched the track isn't just about being a good collaborator—it's a legal necessity for making sure everyone gets paid correctly. Skipping someone can lead to messy disputes and royalty delays down the road.
Your distributor will prompt you to list all the contributors. Be meticulous here.
Here’s a quick checklist of who to include:
Songwriters & Composers: Every person who wrote lyrics or contributed to the musical composition. You need their full legal names. This is how PROs like ASCAP and BMI track and pay out publishing royalties.
Producers: The person who shaped the sound and guided the recording session.
Performers: This means you, any featured artists, and even the session musicians who laid down that killer bassline or drum fill.
Engineers: Don't forget the mixing and mastering engineers who polished the final product.
Pro-tip: Gather all this info before you even start the upload process. Just open a text file and list everyone's full legal name and their role. It will save you a massive headache later.
Choosing Your Genres and Moods Strategically
The final piece is tagging your song with the right genres, sub-genres, and moods. This isn't just for show; it directly tells Spotify’s algorithm how to classify your music. It uses these tags to figure out which listeners might like your song and which algorithmic playlists it could fit on.
Don't just slap "Pop" or "Hip-Hop" on it and call it a day. Get specific.
For example, if you made a synth-heavy pop track with a sad, dreamy vibe, don't just tag it "Pop." Dig deeper.
Your tags could look something like this:
Primary Genre: Pop
Sub-Genre: Synthpop, Indie Pop
Moods: Melancholy, Dreamy, Reflective
Instruments: Synthesizer, Drum Machine, Electric Guitar
This level of detail gives the algorithm so much more to work with. Precise tagging is what helps your song find its way onto powerful playlists like Discover Weekly and Release Radar. You're basically drawing a detailed map that leads Spotify right to your perfect audience.
Crafting a Pitch for Spotify's Editorial Playlists
Alright, your music has been delivered and is sitting patiently in your Spotify for Artists dashboard. This is where the real hustle begins. Just uploading your track is step one; the editorial pitch is your backstage pass to the people who can change your career. This is your one shot to talk directly to Spotify's human curators, and a killer pitch is what separates a track that gets lost in the shuffle from one that lands on a life-changing playlist.
Think of your pitch as the story behind the song. It's your chance to give an editor context, feeling, and a reason to hit repeat when they're swimming in thousands of other submissions that week. Timing is absolutely critical here. Submitting your pitch at least two weeks in advance isn't just a friendly suggestion—it's the industry standard. This gives their team enough breathing room to actually listen, consider, and maybe even find the perfect home for your music.
Telling a Compelling Story
That little pitch box has a tight character limit, so you have to make every single word count. This is no place for generic fluff like "a vibey summer track" or "a song about love." Editors see hundreds of those every day, and vague descriptions are a one-way ticket to the 'skip' pile. You need to grab them with something personal and authentic.
So, what's the real story?
The Spark: What specific moment, conversation, or place kicked off the whole idea?
The Process: Did you use a weird recording technique? Collaborate with someone unexpected?
The Meaning: What are you really trying to say with the lyrics? Dig deeper than the surface.
For instance, instead of saying, "This is a sad breakup song," paint a picture. "I wrote this in my car right after packing up the last of my ex’s things. The main synth line is actually a recording of the city bus outside my window, pitched down to match the hollow feeling I had." See the difference? That one sentence gives the editor an emotional anchor they can connect with.
Your goal is to make the editor feel like they've stumbled upon something special. A good story transforms your track from just another MP3 into a piece of art with a backstory, making it way more memorable.
Selecting Your Tags with Precision
After the story comes the tagging for genre, mood, instrumentation, and culture. Just like your metadata, these tags are crucial data points that help editors filter through the noise. Don't rush this part. It’s a huge mistake. You need to be as specific and accurate as you possibly can.
If you made an indie pop track, don't just stop at "Indie" and "Pop." Is it "Bedroom Pop"? "Synthpop"? "Dream Pop"? The more niche you get, the better your chances of landing in front of an editor who specializes in exactly that sound. The same goes for instruments. If a cello carries the chorus, you better believe you should be tagging "Cello."
Outlining Your Marketing Plan
This is one of the most overlooked—and most powerful—parts of the entire pitch form. This is where you show the editorial team you're not just dropping a song and hoping for the best. You're a partner. They want to get behind artists who are actively building their own momentum.
Listing your marketing plans shows you're serious and reduces their risk. An editor is far more likely to champion a track that already has a promotional engine behind it.
Here’s what you should be talking about:
Social Media: Mention any scheduled posts, TikTok teasers, or paid ad campaigns you're running.
Press & PR: Working with a publicist? Have any blog premieres or interviews locked in? Name them.
Playlist Outreach: Note your plans to hit up independent curators. If you have any confirmed placements, mention them.
Music Video: If a video is dropping, share the release date and how you plan to push it.
When you show that you’re investing your own time and money into the release, it makes your song a much more attractive bet for an editor. It proves you're not just looking for a lucky break; you're building a career.
For an even deeper dive, check out our guide on how to get on Spotify editorial playlists. It's filled with advanced strategies that can give you a serious edge. Nailing this pitch process is a core part of getting your song on Spotify and in front of the listeners who matter.
Your Release Day Plan to Trigger the Algorithm
That feeling when your song finally goes live is incredible, but don't celebrate just yet. The first 24 hours are make-or-break. This initial window is your golden opportunity to send a massive wave of positive signals to Spotify’s algorithm. A strong launch day tells the system your track is catching fire, which nudges it to show your song to more and more listeners.
Think of this plan as your playbook for creating that essential release day buzz. It’s all about a coordinated promotional push to drive immediate streams, saves, and shares—the exact metrics that get the algorithm’s attention. You don’t need a huge budget for this, just a smart, focused strategy.
Mobilizing Your Core Audience
Your existing fans are your day-one army. No question about it. They're the ones most likely to stream your song immediately, save it to their library, and drop it into their personal playlists. Your only job is to make it ridiculously easy for them and get them all to act at once for maximum impact.
Get your assets ready ahead of time. I'm talking shareable graphics, short video clips, and pre-written captions for every social platform you use. Don't just dump a link; remind them of the story behind the song and give a clear call-to-action, like, "Listen now and hit the '+' to save it to your library!"
And don't sleep on your email list. It’s one of your most powerful assets because, unlike social media, you aren't fighting an algorithm to reach people. A single email on release morning can drive a huge, concentrated wave of initial streams right where you need them.
Focus all your energy on two key actions on day one: saves and playlist adds. A stream is good, but a save or a personal playlist add is a much stronger signal to Spotify that your song has real staying power.
A Coordinated Social Media Blitz
Posting once and hoping for the best just won't cut it. A successful release day needs a coordinated attack across all your channels. Treat it like a multi-platform event celebrating your new music.
A solid release day social media schedule might look something like this:
Morning (9 AM): The big announcement. Post your best graphic or video on all platforms and pin it to the top of your profiles so nobody misses it.
Afternoon (1 PM): Hop on Instagram Live or TikTok. Play an acoustic version of the new track, share some behind-the-scenes stories, and personally remind everyone to go stream and save the official version.
Evening (6 PM): Share the love. Post some of the best fan reactions or reshare posts from listeners who've added your song to their own playlists. This builds social proof and gets others excited to join in.
Make sure you update the "link in bio" on all your profiles to point directly to your new song on Spotify. You want to remove any friction that might stop someone from listening. Nailing a solid launch is a massive part of learning how to promote your music on Spotify the right way, as those early spikes can make a huge difference down the road.
Reaching Beyond Your Fanbase
Your audience gives you the initial spark, but getting your song onto playlists curated by other people is how you pour gasoline on the fire. Securing placements on independent playlists is absolutely crucial for reaching new listeners who have never heard of you.
This takes real research and professional outreach. Blindly spamming every curator you find is a complete waste of time and a fast track to getting blacklisted. You need a targeted approach to find the right playlists where your music will genuinely fit in.
Finding and Contacting Curators
The whole game is about finding curators who already feature music like yours. This is where tools like the artist.tools Playlist Search become invaluable, letting you filter playlists by genre, mood, and even keywords to find those perfect fits. Once you build a solid list, the platform can often help you track down their contact info, which is usually a submission form or an email.
When you do reach out, keep your email short, personal, and professional.
Personalize It: Mention the curator's playlist by name. Even better, mention a specific track you liked. It shows you've actually listened.
Be Concise: A quick intro to you and your song is all you need. Always include a direct link to the track on Spotify.
No Attachments: Seriously, never attach an audio file to your email. Always use a streaming link.
This kind of targeted outreach is what builds momentum beyond your initial fanbase. Just one good placement on a well-run playlist with real listeners can introduce your music to thousands of potential new fans, keeping those positive algorithmic signals flowing long after release day is over.
Common Questions About Getting on Spotify
Even with the best-laid plans, a few last-minute questions always seem to pop up as you get closer to release day. Let's tackle some of the most common ones so you can move forward with confidence, knowing no small detail is going to trip you up at the finish line.
A big question for new artists is always about getting paid. The short answer is you get paid per stream, but it's not a flat rate. The exact amount fluctuates based on things like where your listeners are and whether they're on a Premium plan. Your distributor handles collecting these royalties and then pays you out based on their schedule, which is usually monthly or quarterly.
What If My Song Information Is Wrong?
Mistakes happen. Maybe you're looking at your release on Spotify for Artists and you spot a typo in the title, or you realize you credited the wrong collaborator. It's a gut-wrenching feeling, but don't panic—this is almost always fixable.
You can't just log in and edit the info on Spotify yourself. Instead, you have to go back to the source: your distributor. Reach out to their support team, let them know what's wrong, and they'll submit a request to Spotify to update the metadata.
Just be aware that these changes aren't instant. It can take a few days to a week for everything to show up correctly on the platform, which is exactly why it’s so critical to triple-check every single detail before you hit "submit" on your distributor's website.
One of the biggest potential headaches is getting your music on the right artist profile. If you have a common name, your new single could easily land on someone else's page. Most distributors have a field where you can paste in your Spotify Artist URI to make sure your music goes exactly where it belongs.
Other Frequent Inquiries
A few other questions pop up all the time. Here are the quick answers:
How long does it take to get on Spotify? Once you upload through your distributor, it typically takes 2-5 business days for your song to go live on the platform. Sometimes it's faster, but don't count on it.
Can I choose my release date? Yes, and you absolutely should. When you upload your music, you can set a specific future release date. This is non-negotiable for planning your pre-save campaign and your editorial pitch.
Why can't I see my song lyrics? Getting lyrics on Spotify isn't automatic. You have to add them through a third-party service like Musixmatch, which then syncs them with Spotify for your fans to see.
Ready to stop guessing and start building a real strategy? artist.tools gives you the data and insights you need to handle your Spotify release like a pro. From spotting fake playlists to crafting the perfect editorial pitch, our platform is built to help you grow. Take control of your music career today at https://artist.tools.
.png)
Comments